
I was waiting until we finally got the fan light glass fitted (how long it’s taken is another story) but that reveal will have to be another post.
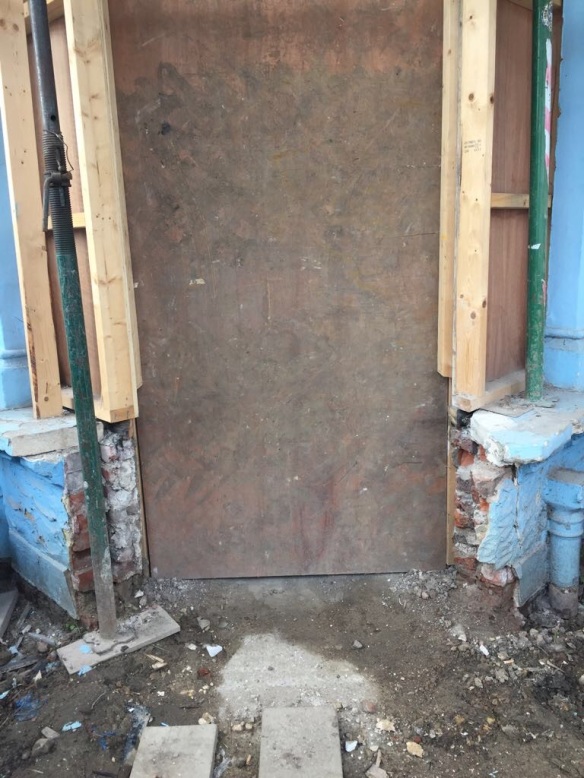
If you follow my Instagram account you may have seen that we’ve had a lot of comments recently asking how we went from this:

to this:

So here’s a run down…
- Re-built the bay
- The bay was knocked through to allow for the JCB to get in to the back of the house so it had to be rebuilt – which is why it looks so crisp


2. Replaced the windows
- Obviously the existing windows were not the originals! So we went for new double glazed sash ones that look so much better and keep the cold out
 3. Hacked off the existing render & pebbledash
- We had a peek under the render on the first week which showed that although the rest of house is built with yellow London stock brick, the front is red brick
- This was very common apparently because red brick comes from up north so was more expensive – and some kind of sign of affluence I guess
- It wasn’t until 7 months in to the renovation that we started to hack off the horrendous rendering and pebbledash
- Now I know pebble dash Isn’t that appealing to the eye but it is actually a very smart render because it allows the house to breathe through the different seasons. Had the house been covered in only pebbledash we may have considered a different option. After all we live in Wandsworth where pebbledash originated!
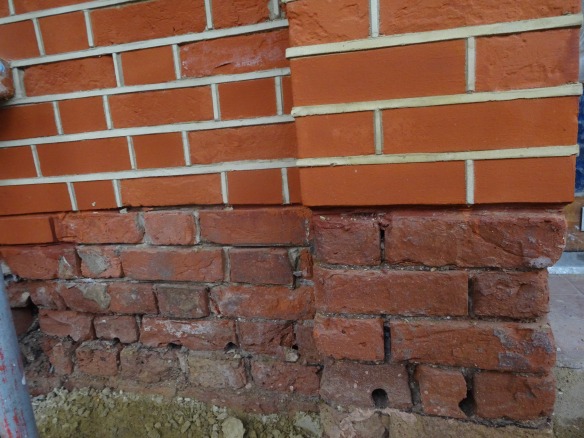
- Once this was all removed – by a jackhammer! A lot of the bricks were damaged. Plus because of the bay we have new and old bricks that need to look consistent


In came the experts. The London Brick Restoration company spent 3 days working their magic on the old bricks. They ground up red brick in to a paste and somehow managed to paint it back on. See the difference here between old and restored
- Then they re-pointed the entire front with a pointing style called tuck pointing which looks super neat
 4. A new lick of paint
- Painting all the new rendered sections and window ledges, finally getting rid of the blue!
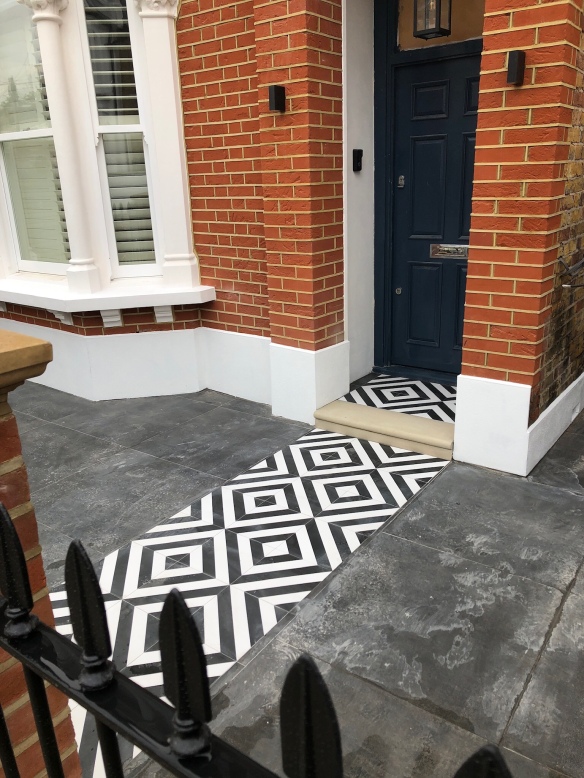
 Plus we got a new door installed and painted that a deep blue
- 4. Built a new front wall
- Again, it’s not like we were dealing with an original front wall. But we did want to ensure that it complemented the house
- We went low so that the railings could be high. We wanted decent pillars either side of the gate but also ensured that we weren’t standing out on the street too much, so we went along the street and measured some!


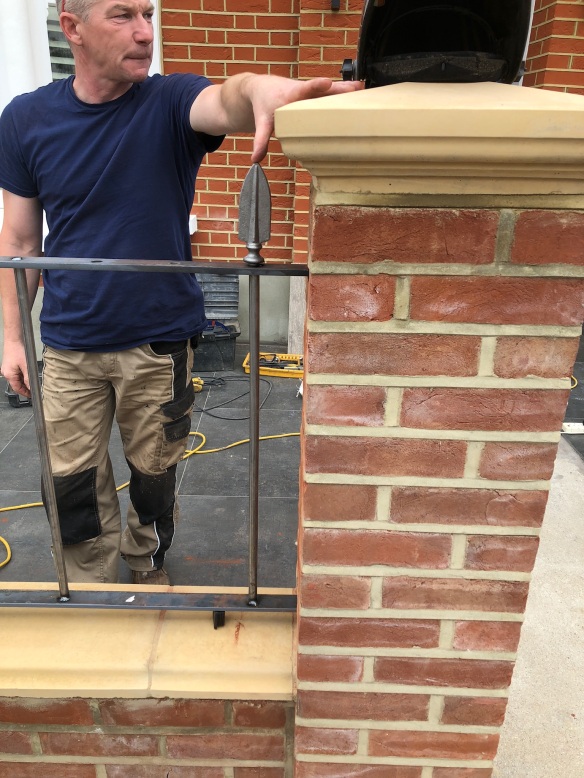
We added coping stones and pier caps in sandstone colour


 5. Added some stunning railings
- Then came along Jack. He’s an awesome welder and made us the most awesome railings on site.
- We went for a spearhead top which is quite typical of the era.


Then we went for a straight edged gate with dog bars
 6. Sorted out the tiling
- We sourced from a local tile place in Balham some dark grey 80×80 porcelain tiles for the patio and bull nosed York stone
- I had contemplated going for the traditional chequered path but decided to be a bit more daring. It took months of looking but when these monochrome tiles came up on Fired Earth I knew they’d be perfect

 7. Made a great side gate
One of the great practical features of the house is the side alley. This used to be access to the garden but now we have filled it in to accommodate the w/c but kept the side door for a super handy buggy access.


We have a few long steps going down so it’s easy to bump the buggy down and because the plot is wider at the front it’s great storage space for scooters and bikes.
The neighbouring wall is really tall so we needed a high gate with a lockable door. Luckily Jack was on the same wavelength and ta-da!!


8. Planted some pretty trees
- Finally we got Leo from the Blueteam garden company in again and he planted us some beautiful bay trees and lavender – which I’m hoping will survive!


