Week 7: Steels Are In

On a perfectly clear Saturday afternoon, with both of us uncharacteristically available, and in the same country (!) we took the opportunity to head down and see progress…

Welcome to our new ground floor!

IMG_3545
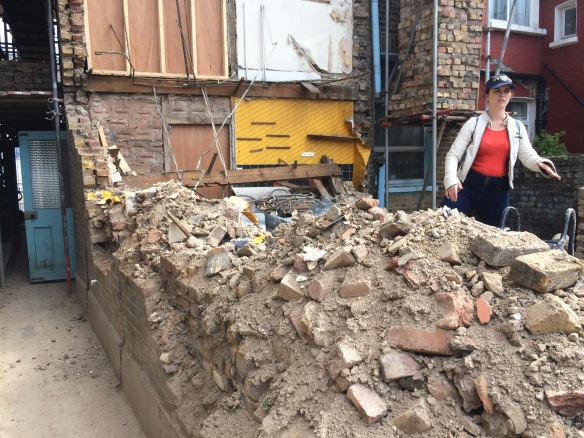
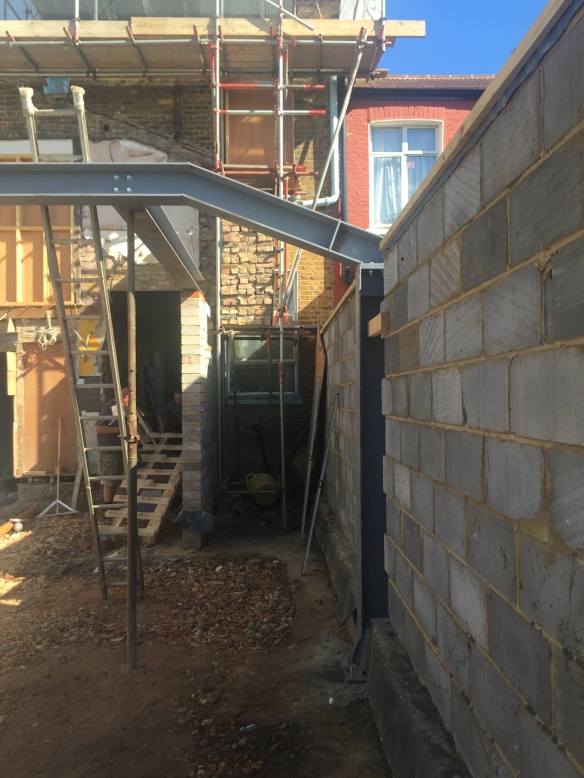
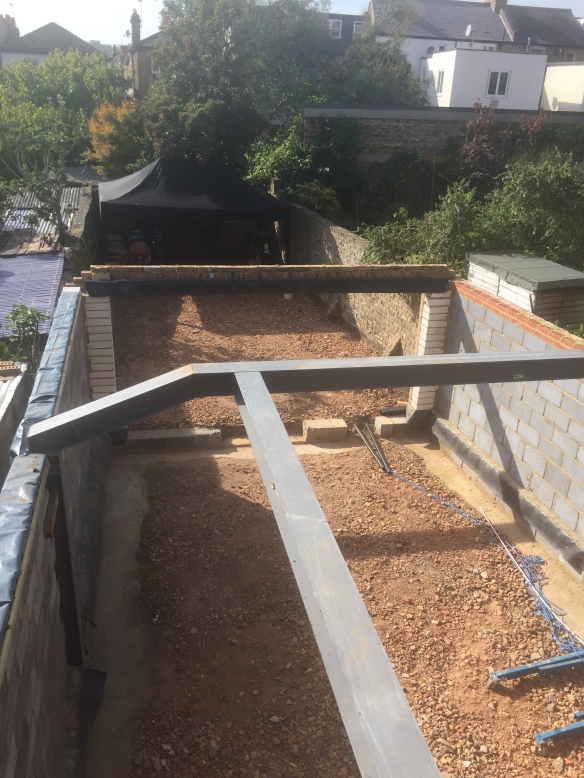
The concrete walls are laid, and steels for the structure are in! What’s also quite cool is what Paul decided to do with the old rubbly bricks from what was here before – see all that red hardcore on the ground? That’s the old house! The bricks that couldn’t be re-used as actual bricks have been recycled, with the help of a brick grinder, in to the foundations of the new extension. It’s a nice thought that the new part of our home has been built on the old bricks.

IMG_3553

This will be the view from our kitchen island. The nearest steel is where the original structure ended so you can now see how big the extension is. Between the two steels the ceiling height will rise.

Screen Shot 2017-09-24 at 19.30.04
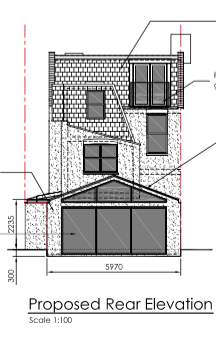
This will be a pitched roof with four glazed windows so that the kitchen is flooded with light. At the end will be 3 large floor-to-ceiling sliding glass doors, with a glass triangular gabled end above them.

It was so exciting to see the actual space that we have been imagining every time we took a look at the drawings… which has been for over 6 months now!

The other important thing is to see the way the light and shade moves across the extension. We are south facing, and even in winter on a sunny day the rear of the house and garden sees a lot of light throughout the day. Decisions that seem small and those that you’d think you’d only make later on actually need to be thought of now. For example, looking at the picture which is the better wall to place the TV? We actually had the right hand wall in our plans but seeing that this would be in the sun for most of the day, we’ve changed it to the left hand wall so that it will be in the shade.

IMG_3548

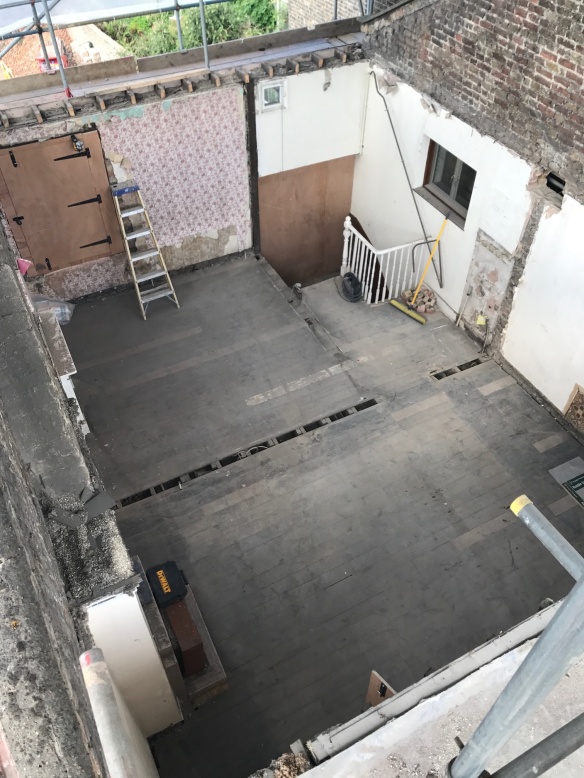
This picture shows where the side return extended section is. The ceiling from the steel down towards the front of the house will have four velux windows at an angle. Towards the back of the picture is a structural wall, creating a small area where the sash window is. This will be a little study/ play area.

IMG_3549

On the other side of this wall will be the utility room. (An actual room for utilities!! – yes I am way too excited about this) More about that later on in the blog though…

Here’s the layout of the whole extension

 Screen Shot 2017-09-24 at 19.19.24


The hallway is extended down some steps in to a vestibule where the utility is on the left and the wc on the right with a boiler tucked away in a cupboard. We will be using pocket doors to maximise the space in this area. Going in to the kitchen will be through an extra-wide and tall crittal-style glazed door.

You can see where the original line of the house was on this plan (just beyond the island) and it was very dark with little natural light and a low ceiling. It will be so great to see this kitchen transformed with the additional space, glazing and height!

Here’s a view from the side bedroom window:

IMG_3590

Ground floor plans can be found here.

Up on the first floor it is still open plan, but with a new supporting steel for the future loft floor. The positioning of this steel was the reason why the dividing wall to the two bedrooms was taken down – because it’s better and easier to rebuild this with a stud wall than to cut the steel in to the original.

IMG_3554

As this floor is very open Axe and I have made use of the space by drawing out the layouts of each bathroom on the floor and discussing more about where things will go. Although we could do this anywhere we find so much inspiration by being physically in the property. It was such a great weekend for the weather we were able to spend some great time in the space imagining and thinking, and getting excited for the weeks to come!

K

Weeks 5-6: Starting from Scratch

“Should we have just knocked it all down and started again?!”

Both of us have said this at different points over the past couple of weeks because every time one of us visits the house, there is less and less of the original building there! Now the first floor is getting the demolition treatment which went something like this…

…”So we measured the maximum height you have in the loft and it isn’t enough so we need to lower the ceilings in the first floor…”

Fair enough, we’d expected this as we had to do this in the last house…

“Right, so the main supporting beam is going right where the dividing wall is so we are better off taking that wall down and replacing it later…”

The best view is from the top of the scaffolding… don’t try this at home folks!

IMG_8192.JPG

So you can understand why we were asking the question of why we are not rebuilding completely from scratch!

The thing is, we still have the majority of our four walls left and it does take a lot of time to rebuild these four walls in brick and it does take a lot of time, money and skips to remove all of the rubble- so there is a bit of method in our madness. (You’ll see)

Meanwhile, we still have a JCB going through the house, clearing the remains of the rear…

IMG_0263

…and work is going at pace to lay the foundations and drainage in the extension

IMG_0257

IMG_0225

Its very exciting to see the outline of the kitchen take shape. (Albeit from a blurry camera)

A note about why we decided to build within the garden walls – although we are technically “allowed” to build across the middle of them, which would potentially maximise the space. The main reason is that it would mean more disruption to our neighbours & probably having to demolish and re-build our party garden wall, all for less than half a metre of space. Seeing the outline now and how much space we will have with this option and I am glad that we decided for the less disruptive option!

IMG_0229

I do love this part of a build! Things progress visually so quickly, which won’t be the case once the main structure is up.

Oh, and the rear corner of the house has gone…

It’s hard to describe at the moment but this corner is one of the reasons why we love that the house has that extra space where the side entrance is.

Whilst visually there is a lot going on, our inboxes are also being filled with emails on key decisions about window sizes, materials, flooring choices etc…

Axe is in Ireland for work at the moment so a lot of the weekend is about deciding, weighing up cost differences and compromising so that we can get decisions made. We still haven’t decided on whether to have french doors in the loft master bedroom. It sounds romantic but they can’t open out, so it limits storage space options inside the bedroom. (Can you tell I’m against these!) What do you think?

Weeks 3-4: Ploughing through

When I went to the house last week I was expecting more of the same at the back of the house… more rubble being cleared and work progressing on preparing for the foundations etc.

IMG_0160

End of week 2

IMG_0918

End of week 3

…but they are also now starting to dig in to the old foundations…

IMG_1141

…and also the roof has been taken clean off!

If THAT wasn’t enough, and just when I thought the house couldn’t take any more walls tearing down… more holes have appeared in the walls!


This time the holes are to drive the JCBs through the house to get to the back so they can get digging! As I was snapping away during my brief mid-week visit, Paul was on site checking numerous measurements and plans for the next phase of work, which will include taking more of the house apart (!) as the ceiling of the first floor also needs to be taken down to be lowered.

Those hardcore Axe and Kirstin followers will now be getting a Deja vu feeling because yes you are correct – we’ve been here before! In the Clapham house we also had to lower the ceiling in order to allow for a better head height in the loft.

Who would have expected a 100 year old victorian building to be so unaccommodating to modern 3-story, open plan / broken plan, more bathrooms than bedrooms living eh?!

IMG_1146

Paul up on the bare roof

I did manage to steal Paul away for an important meeting to discuss a whole list of decisions we needed to agree on such as minimum acceptable heights of the first floor and loft, decision on whether to have french doors, positioning of the landing window, whether to go for hardwood or softwood windows, opening or non-opening windows in the extension, minimum spec. for electrics, positioning & height of hallway doors…. it was a much needed discussion to align on some key items and also ensure we were both agreed on how these would change the budget.

Here’s a picture of Paul ‘being the doors’ as we measured up where the glazed doors to the front living room will be.

IMG_1154

I’m really excited about these doors. They will let in so much lovely light in to the hallway from the bay window in the living room, and will look magnificent.. more on these later on!


K