Weeks 44-45: Wiring and Tiling

Hunter is now on first name basis with our electrician and tiler, Junior and Todo.

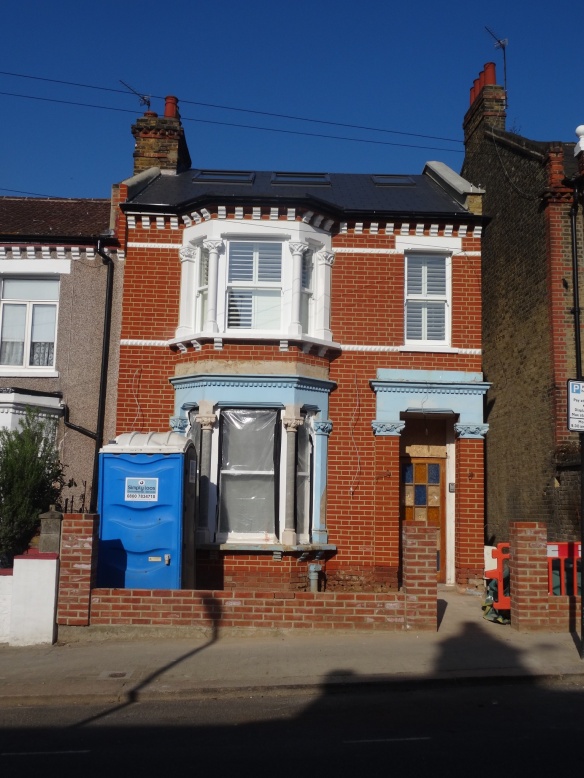
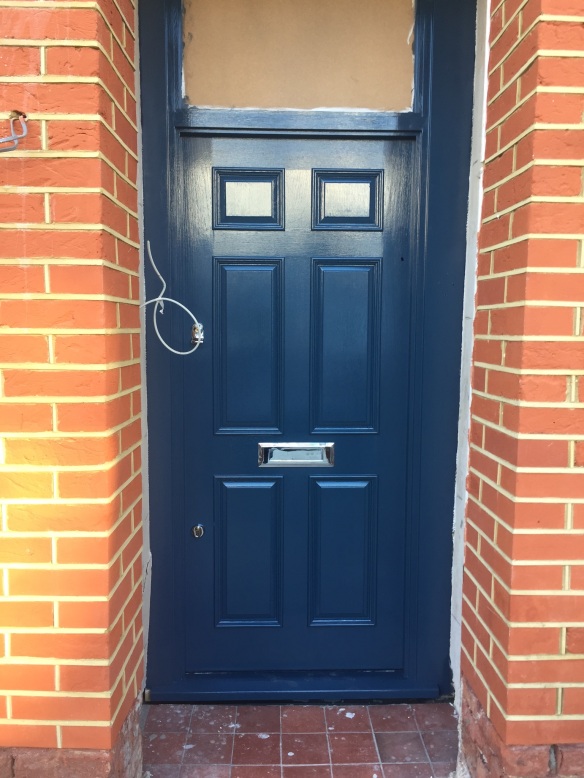
Todo and his some have been working on the vestibule floor, patio and front. We’ll post about the front in the future but here’s the front door painted in F&B Stiffly Blue:

IMG_1546

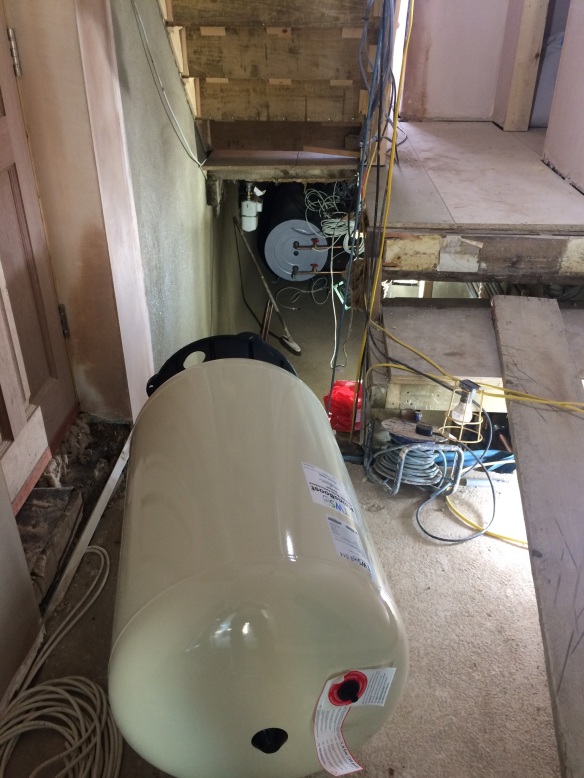
So on to the vestibule. This is an area we got really excited about right from the start when we planned out the extension. Basically it is a second hallway, connecting the side door, w/c, utility, boiler room, basement and kitchen.

The downside of a victorian terrace is that the hallways tend to be very skinny – or non existent. I really wanted a grander entrance but extending in to the side at the front would have been a costly extra 50cm of space.

The area started off as a bit of hallway after the stairs and the start of the old kitchen:

IMG_0161

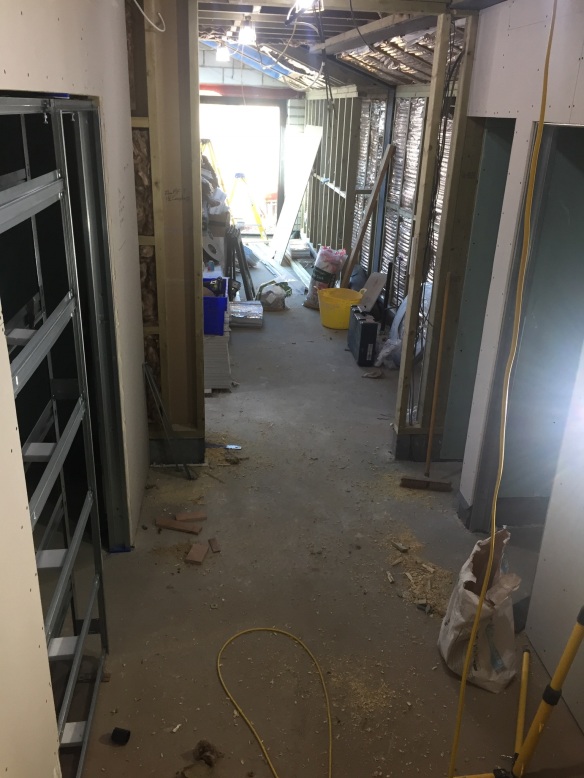
Then when we knocked down the back of the house, turned the old kitchen space in to a utility and put the framework in,  we started to see the space it could turn in to.

IMG_0642

At this stage it still looked quite small, but adding the walls and doors always adds perspective:

IMG_1090

We then had the stairs put in, and self levelling matting then Todo could start the tiling.

Just when you thought we’d had enough of marble-effect porcelain, we added some herringbone to the mix!

Here’s what it looks like almost finished:

IMG_1564

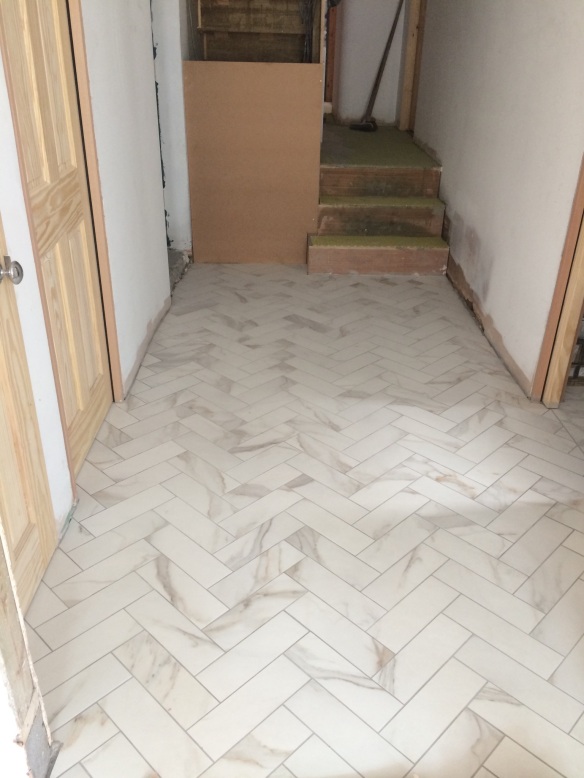
(For anyone interested that’s “medium grey” grout at 2mm wide)

Todo was also busy sorting the patio for us. Like any builder, when you say patio, ours thought of the big slabs usually used. We went for a slightly more contemporary style and chose wood effect porcelain.

IMG_1542

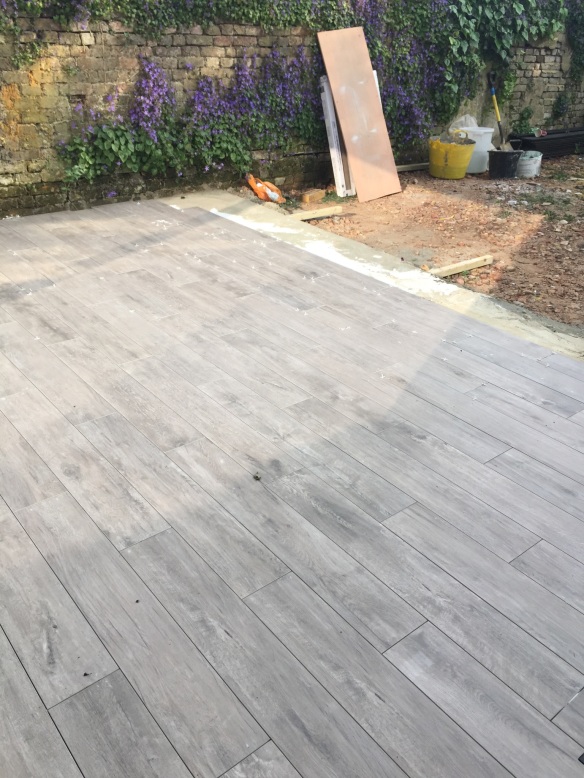
It is also is a very high non-slip rating (R12) which means that even in the rain it makes it very difficult to skid on.

So that’s a third of the garden done. Next week the wall is being rendered at the back, but we still need to sort out decking and grass before the summer is over.

IMG_7270On to lighting. Junior has fitted nearly all of the bedside lights. We have these Anglepoise ones in most of the rooms: (clearly I don’t have a recent picture of one actually fitted!)

In one of the guest rooms – which will be Hunter’s future bedroom we went for these flush Astro lights that go one when pushed open. Functionally, this is so that the room can be flexible and we don’t have big lights in the walls when he has a small bed in there, but also because they are really cool.


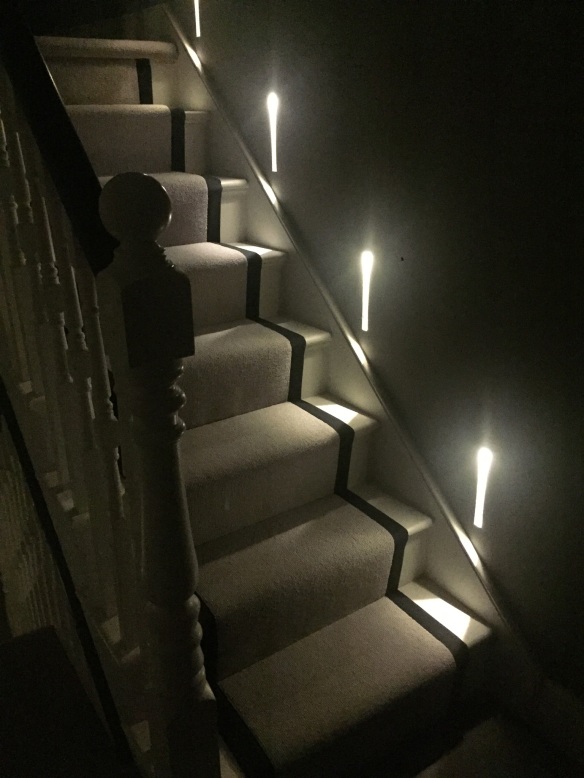
We also finally have working starlights (I won’t bore you with the driver saga)…

These had to be plastered in – which half of them were and the other half – well the plasterboards didn’t get the memo. So poor Junior had to cut these all out and there will still be quite a bit of making good.

Here’s a picture of the ones in the loft that were plastered in and wall painted:

IMG_1547

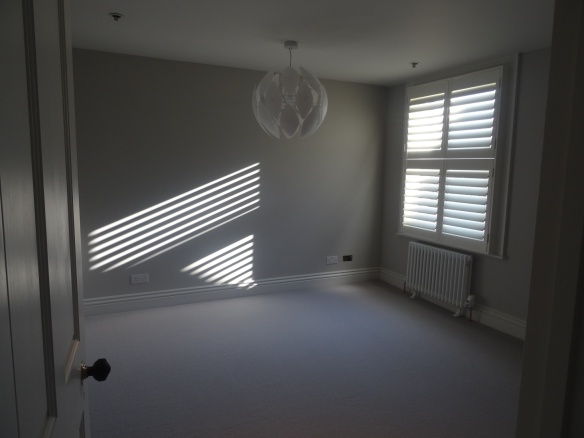
And finally, one of our pendants is up. This is a FLOS “Tatou” that we got in the John Lewis sale and hangs in the front bedroom:

IMG_1552

K

Weeks 40-41: Getting it Liveable

The time has come when our budget and timescale has dictated that we need to move in to the house – so the past couple of weeks have been a huge push from our builders to get the place liveable and safe so that we can stay there.

IMG_7486

First up was getting running hot water through the house. The boiler had been installed but none of the bathroom fittings had been finished, nor the radiators in so this was a key job to be done.

Like our splash-back decision? It’s a copper metallic effect on glass. I especially love the way it reflects the crap that’s currently being stored in the utility room!

The bathrooms were all (and still are!) at different stages of completion, so the team worked on having at least one complete bathroom and another running toilet.

The first one to be finished with fittings, running water and lighting was the loft en-suite:

DSC02877

IMG_1504

IMG_1476

So nice to have running water. All that’s left in this room is the PIR automatic light and the splash back.

The other bathrooms are shaping up nicely too!

Here is the small loft bathroom:


The front bathroom:

(check out the shutters!)

Family Bathroom:

Woohoo we have a bath!

DSC02871

Still a few lighting bits and fixings to go but they are nearly there.

Next was getting electricity running and putting faceplates on so we can plug things in! We prioritised the rooms that had carpet in and shutters so that we would be able to have a decent night sleep. We now have two rooms that have carpet, shutters and lighting in:

Side bedroom:

DSC02873

Rear loft room:

DSC02876

Plus the loft master bedroom is also carpeted but no shutters yet:

DSC02879

Here’s a fittings montage:

This still means we don’t have lighting downstairs bit at least it is summer! The ovens, fridges and tap works and after a clearcut and a clean the kitchen looks like this:

DSC02867

DSC02864

DSC02866

DSC02862

We are especially pleased with our fancy hob, which is not only induction, but has an extractor built in which meant we didn’t need to have a bulkhead above the island.

DSC02868

It is from German brand, Bora and was sourced by our kitchen suppliers.

Also – cue fanfare – the scaffolding has been taken down after 9 months and the new restored brickwork can be revealed!!!

DSC02881

I can’t stop looking at it. what a transformation from how it was before:

IMG_0152

Now that we are in, it is actually really beneficial being in it every morning and evening. We still don’t have any furniture, and living in the space really helps to make decisions. Hoping that we can soon so that we can start booking friends and family round to stay when it is more finished!

K


Weeks 37-38: Good Investments

Like most people undergoing a transformational renovation we have been faced with a multitude of decisions on what we should be spending our money on, and where we can afford to spend less.

IMG_6960

The house before it all started

When working on a large renovation, and a fixed budget it is important to be really clear yourself about what you are prepared to invest in, and where you’d be willing to make the sacrifice. Sometimes the decision is too hard and the sacrifice is on the bank balance or your short term life choices. (Not going on holiday, living in the property / caravan etc)

The clearer you are about this from the beginning, the “easier” it will be to make important decisions during the build. Like: “Should we replace that wall”, “How much do we spend on flooring”, “Do we go for underfloor heating”, and “What is our kitchen budget”…. you get the drift.

It was clear that our house needed A LOT of work on the structure, and actually getting it to a basic working property with heating and lighting would all be starting from scratch. So along with this we decided that making the structure and workings of the house to be the priority for our budget – but also, to invest in making these last for as long as possible as this would be our family home for a long time.

We’ve been blogging a lot about the structure and extensions of the build, but actually there has been a huge amount of plumbing and electrical work done.

IMG_0160

The heating was far from ideal!!

We were basically faced with a blank canvas. The plumbing and electrics were far from up to scratch, and with half of the house being demolished, it was clear that a lot of the budget had to go on this. Here’s what we’ve learned…

  1. Turning a 3 bedroom, 2 storey knackered property in to a 5 bedroom, 4 bathroom 3 storey property involves a LOT of pipes!
    • The first fix involved getting all the pipes to radiators, towel rails, sinks, toilets and showers to the right places and then run under the floors (or outside for the soil pipes) and all the way down to the cellarIMG_0967
    • It really helps to know your bathroom layouts as early as possible
    • Also, where your radiators are going to go and if you want the pipes coming out from the floor or the wall
  2. It requires some horsepower to ensure the showers have enough pressure in the loft
    • Victorian properties were built for one simple bathroom. When you’ve got 2 in the loft alone this calls for not only a large water tank but a way of ensuring the pressure is good and consistent – especially when other appliances and showers are going at the same time

      DSC01871

      The bathroom off the kitchen!

    • The obvious place for us to put the water tank was in the cellar… a long way from the bathrooms but it’s out the way and doesn’t take up cupboard space

      IMG_1350

      One of the 3 huge tanks!

    • The water pressure from street level in our area is terrible at best, so we also needed a way of bringing in this water and converting it to a better pressure value to suit our needs – this means we needed an Accumulator. In fact, because our cellar was so low in height, we couldn’t get the big one we needed so we had to get two!

      IMG_1351

      Accumulator tank

  3. There are all sorts of options when it comes to heating
    • A mistake we made on the last house was not having underfloor heating in the kitchen, so we knew with a bigger kitchen this would be a must have

      DSC02785

      Boiler with underfloor heating pipes under

    • We also chose underfloor in the bathrooms but not in the bedrooms or reception rooms
    • Radiators come in all sorts of styles but we decided to spend the extra and get column traditional ones – although we have gone for the standard screw fix ones rather than the expensive cast iron version
  4. The cables have to go somewhere!
    • With an average of 5 double sockets per room, 3-4 light circuits and each bedroom having points for TV and internet, that’s a lot of cables, and they all have to terminate somewhere 

      We chose the utility room for the termination point of the cables

  5. Lighting makes a huge difference to the final product if done well
    • Unless you’ve had a lighting layout done by an architect or designer at the drawings stage, your builder will base their pricing of a standard spec which involves a set number of spots/ downlights in each room spaced equally
    • It makes a huge difference having a lighting layout that works for how you will be using each room – however this means that 1) you’ll be spending more in fittings and on the labour and 2) you need to know exactly where all the furniture is going in each room first
    • We didn’t go over the top (apart from in the kitchen – see point below!) but we did end up getting lights cabled in next to each bed, and getting a layout designed so that each circuit created a different effect. We focused on the ground floor and kept the bedrooms quite standard

      DSC02770

      Cabling for TV, Internet and light fittings beside the bed

  6. If you’re going to invest in smart home tech – choose wisely
    • We all love a gadget, but when it comes to the home do we really need an oven that you can turn on from your mobile when your on the bus home?!
    • There are plenty of options to tech-up your home but they all come at a price, so think about whether this will really add value to your life, and if this renovation is for a 5-10 year home, perhaps skip it altogether!
    • We decided to go for function over style with the radiator valves and have gone with EvoHome which means you can decide the exact temperature output of each room in the home
    • We also went for a cabled lighting system in the kitchen, rather then the whole house. This was mainly because we were going to be using the kitchen the most when we move in and for many different functions, so wanted the lighting to reflect the moods.

So the past 2 weeks have been really about getting the arteries of the house to working order, as well as more painting, finishing the skirting and general getting on with stuff. Next week the flooring comes and we focus on the outside!

K